Quick Menu
Create a development environment with VirtualBox
This documentation page aims at explaining how to setup a YunoHost virtual server, using VirtualBox, to work on application packaging.
Why use VirtualBox rather than an actual YunoHost production server to package an application?
There are mostly two reasons why one should prefer a virtual server rather than their own server:
- You can freely torture a virtual server without any risk of breaking it, since you can always restore it to a former working state. It would really be a pity to break your own real server!
- In a typical workflow, a virtual server state would be restored from a known snapshot before starting any work on it, so as to always keep a clean system, without any residues of a former installation. This allows to always be as close a possible to a user first installation.
We will discuss VirtualBox in this guide, as it comes with an easy to use GUI. If you prefer a pure commandline approach to handling your virtual machine, you should use ynh-dev instead.
Installing VirtualBox
From a GNU/Linux system, simply install the virtualbox-qt package.
From a Windows or macOS machine, you'd have to refer to the VirtualBox download page to fetch the appropriate installation package. The virtualbox package is deprecated since Debian 9, a .deb installation package is available on the abovementioned referenced page.
Whatever your system, there should be no need to install the extension pack or the guest addons.
Installing YunoHost on VirtualBox
Simply follow the appropriate documentation for installing on VirtualBox then the post-installation guide.
During post-install, there is no need to use an actual domain name in .nohost.me or .noho.st, as your virtual server won't be reachable from outside your local network.
We prefer using a fake domain name which will remain associated with your local network, for instance yunohost.packaging.
This domain name, not being registered with any DNS server, will be stored in the hosts file of the computer which will need to access it. Please refer to the documentation about using a local DNS for more information.
Your virtual server is now installed. Before starting to use it, we'll see how to create a first snapshot and how to use that feature.
Using snapshots
VirtualBox becomes even more interesting with its snapshotting feature, which allow to store the virtualized machine state and restore it quickly. We'll also see how to use multiple snapshot branches to work on different apps on the same machine.
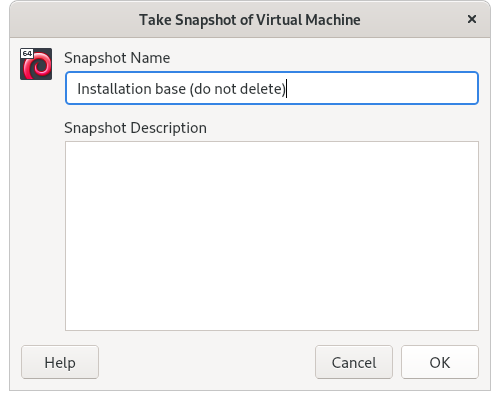
Now, let's create a first snapshot
Before starting to play with the virtual machine, now is a good time to take a first snapshot, so that we don't have to redo the full install process every time. First, stop the virtual machine.
Managing snapshots is done in the 'Snapshots' tab

Here, we're creating a first snapshot
We can now start to work on the virtual machine and create as many snapshots as desired for each milestone of our modifications.
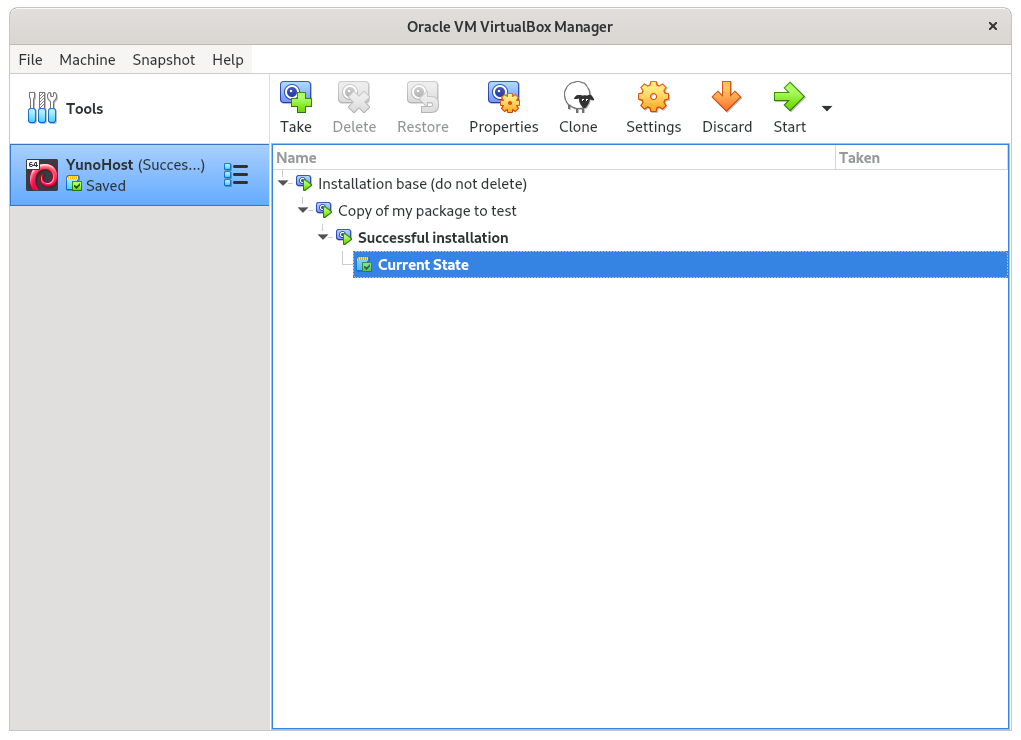
In this example, after having validated our particular package removal works fine, we can easily get back in time by restoring the virtual machine to its previous state with the package still installed. Once the package will be fully functional, it will just be a matter of deleting the snaphots associated with this package work to get the virtual machine back to its initial state. For our next test, we will then be back to a freshly installed YunoHost serveur, without any trace of package installation.
Using multiple snapshot branches
In addition to successive snapshots, it is also possible to create a new machine state and additional snapshots from an older machine snapshot/state.
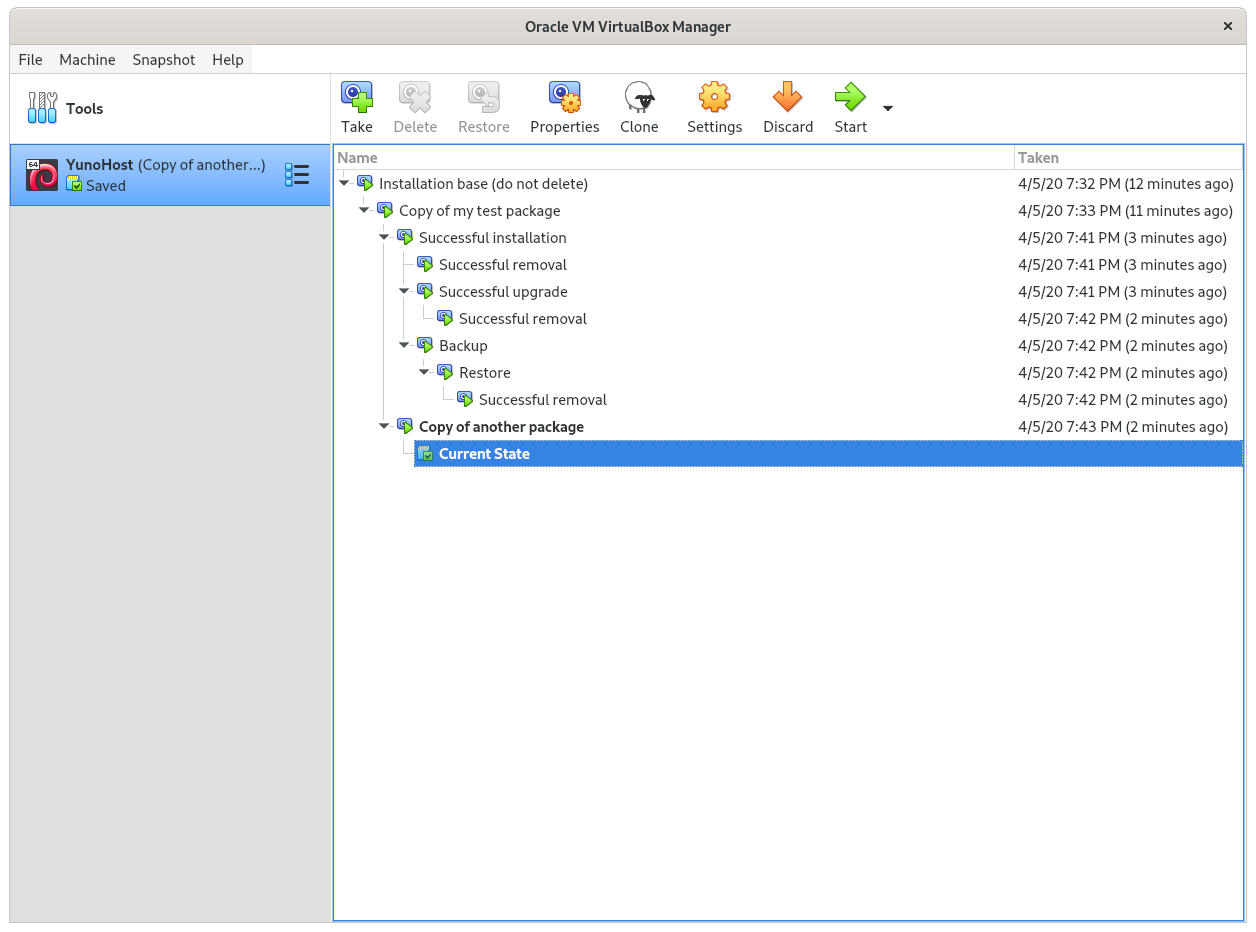
In this example, I have created two branches since my successful package installation, so as to independently test just the application removal, upgrade and backup/restore steps. I eventually got back to the virtual machine base state to start a new test on another package, without dropping my former test whatsoever. At any time, it is possible to get back to a previous snapshot simply by restoring it. The machine always start on the "Current state" state.
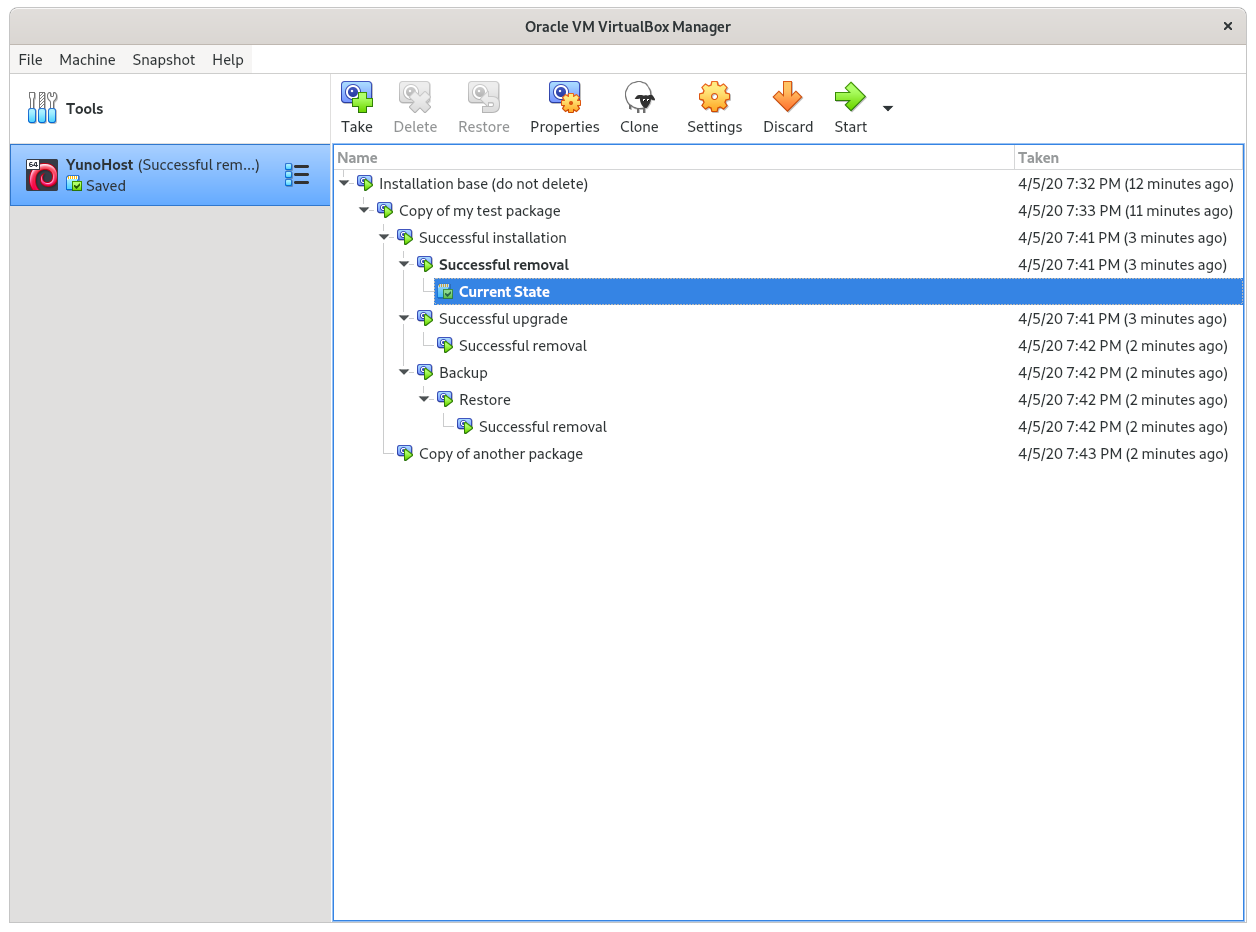
It is always possible to create a new snapshot, whether the machine is stopped or not. To restore a snapshot however, the machine cannot be running.
How do we connect to the virtual machine?
Virtual machine connection is similar to any YunoHost server connection, that is by using SSH.
ssh admin@my.domainOr, if the domain has not been added to the hosts file, via its IP address.
ssh admin@11.22.33.44We can now work on the virtual machine using the commandline.
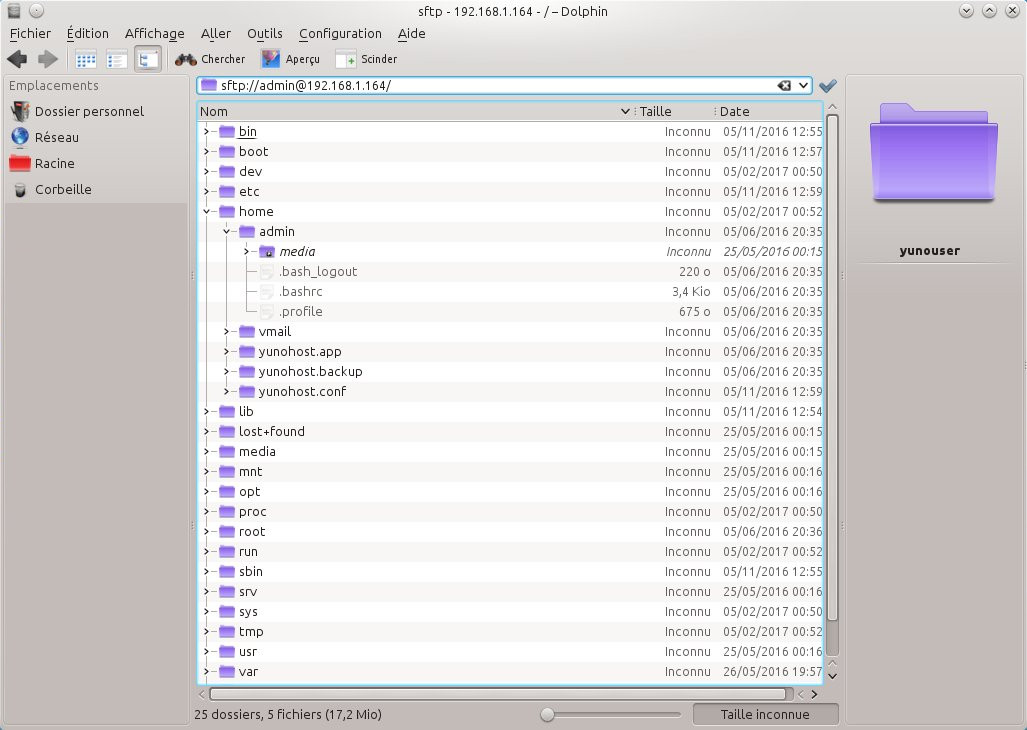
To easily copy the package files or use a graphical text editor, one can also connect via SFTP using a file explorer.
It's a simple matter of using the sftp://admin@my.domain/ address.
Note: on Windows or macOS, the file explorer does not natively support the SFTP protocol...
Found errors? Think you can improve this documentation? Simply click the Edit link at the top of the page, and then the icon on Github to suggest changes.